Categories
In this article
- Introduction
- Steps to Take before Deleting a User from Google Workspace
- How to Delete a User from Google Workspace?
- The Ultimate Solution to Avoid Data Loss- Backup!
- Best Practices for Google Security before you Delete a User
How to Delete a User from Google Workspace Without Data Loss
18 Apr 2025
12 min read
Swati
Article at a glance
- Transfer the user's data to another account using the Google Admin Console, including emails, Google Drive files, and other data.
- Ensure no data is left behind by thoroughly checking all associated services.
What is the solution?
1. Introduction
A 2024 study found that nearly 58% of ex-employees still had access to company systems after leaving their jobs, highlighting significant offboarding issues.
Another report indicated that 89% still have access to at least one company SaaS application after leaving. This creates a hidden security gap that can lead to devastating consequences if not addressed properly.
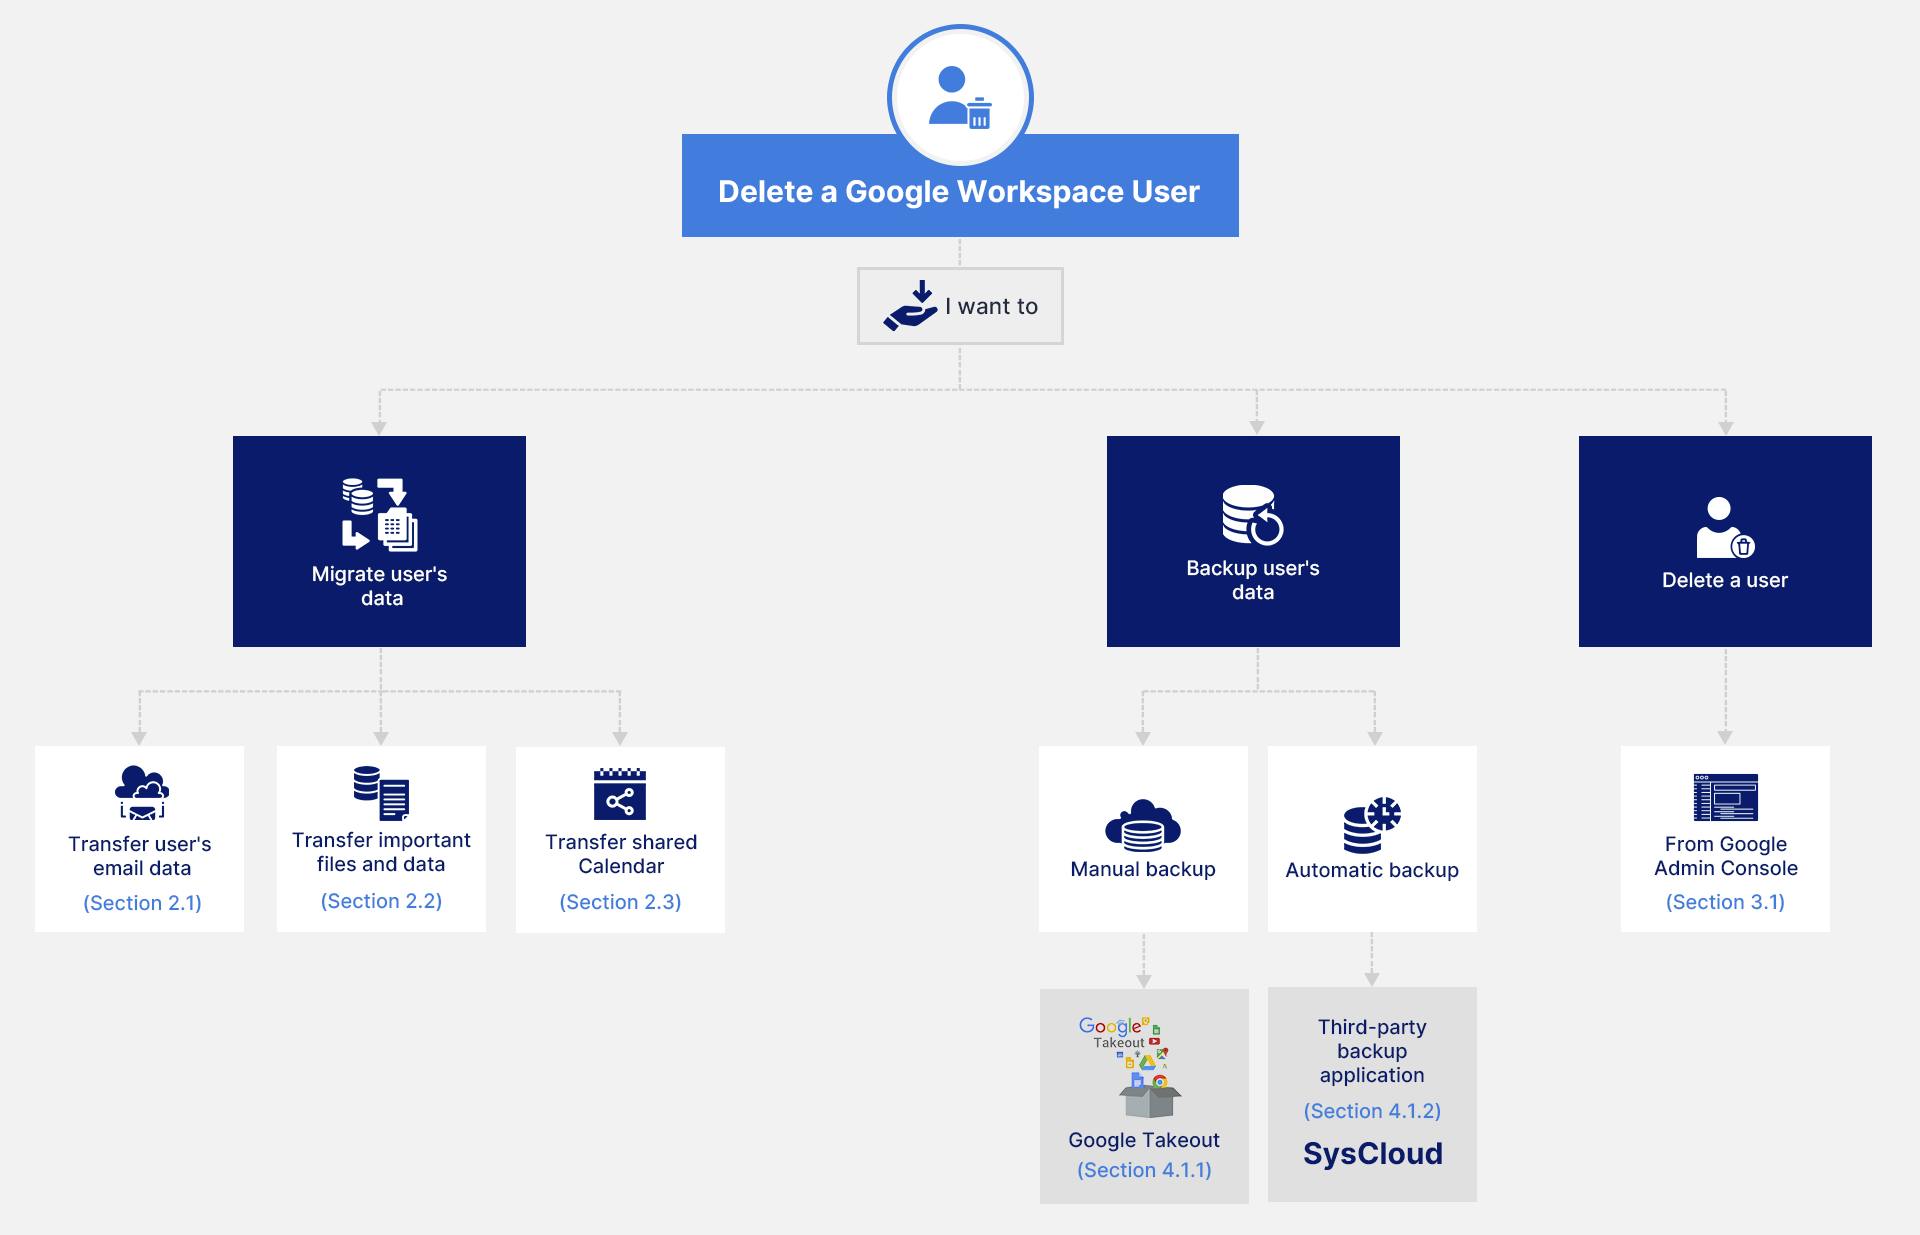
2. Steps to Take before Deleting a User from Google Workspace
Deleting a user from Google Workspace without having a proper backup of the user’s data can lead to the loss of significant information and data. Having a third-party backup application like SysCloud can save the time of backing up an entire user’s data manually. However, if you do not have a backup solution, here is how you can save a user’s account data:
2.1. Transfer User’s Email Data
1. Using data migration service (Classic): A super administrator can migrate a user’s email data to another user of the same domain using the data migration service in the Google Admin Console.
Step 1: Using your super admin credentials, login to Google Admin Console. From the Admin console home page, go to "Data Migration (New)" from Data in the navigation bar.

Step 2: Click "Go to classic migration service".

Step 3: Click "Set Data Migration Up".

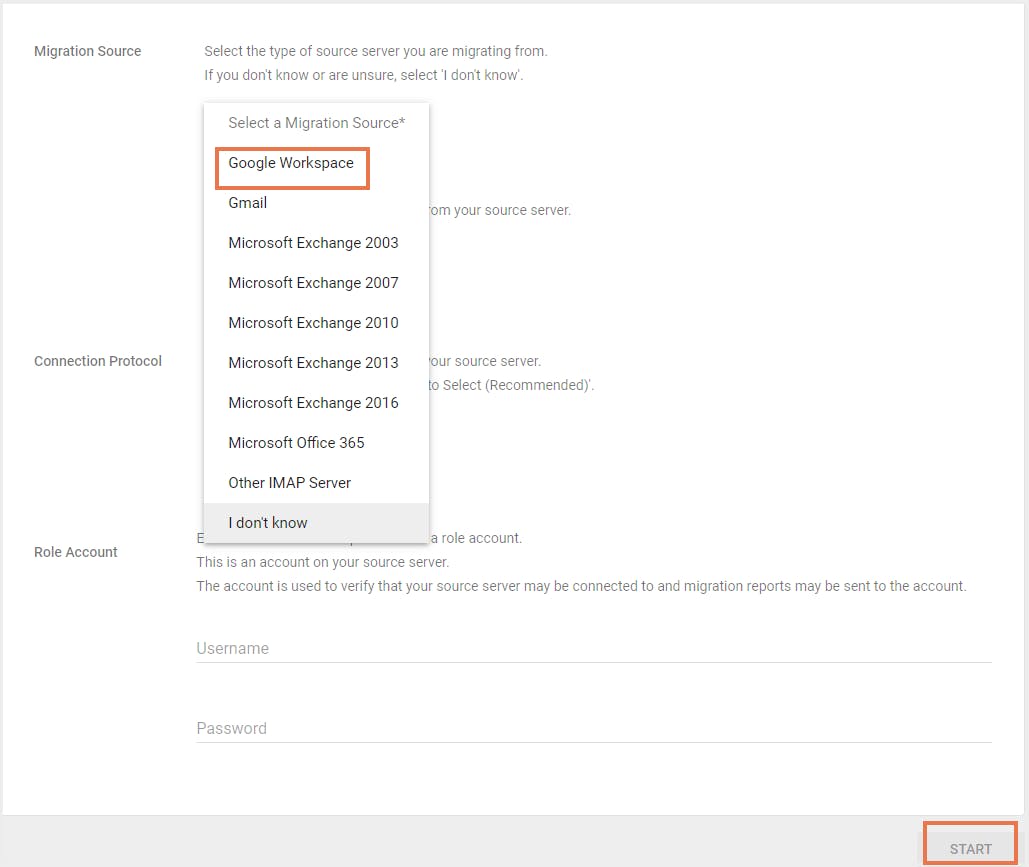
Step 4: Under Migration Source, select Google Workspace and click on start.
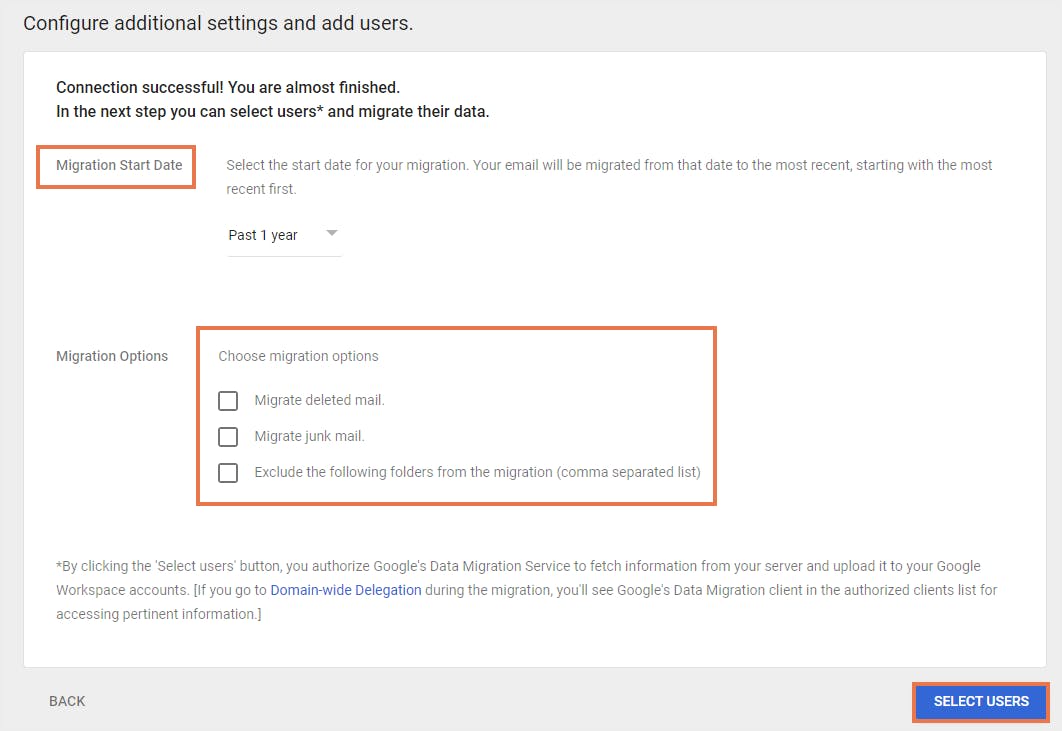
Step 5: Select the date from which the files are to be migrated and what data to be excluded or included.
Step 6: Select the user(s) to which the email data is to be transferred.
2. Redirect the User’s Email to Another Email: Google Workspace administrators can redirect a departing user's incoming email to another active user within the same domain. This ensures that important communications continue to reach the organization.
Note: Email redirection configured via routing rules differs from forwarding:
- Forwarding retains the message headers and shows the email as forwarded by the original user.
- Redirection (via routing) can deliver the email as if it was sent directly to the new recipient, preserving the sender identity and subject formatting.
2.2. Transfer Important Files and Data
- Google Admin Console: Transfer Drive files via Apps > Google Workspace > Drive and Docs > Transfer Ownership.
- Data Transfer API: Automate Drive file transfers via scripts.
2.3. Transfer Shared Calendar
- Share the calendar with another user and grant "Make changes and manage sharing" permission.
- The recipient can then manage all existing and future events.
- Alternatively, events can be exported and imported into a new calendar.
3. How to Delete a User from Google Workspace?
3.1. How to Delete a User(s) from Google Workspace?
Step 1: Log in to Google Workspace with your admin credentials and open Google Admin Console.
Step 2: Go to Users under Directory from the Google Admin Console page.

Step 3: From the users list, find the user or users to be deleted.

Step 4: Click on More → Delete User.

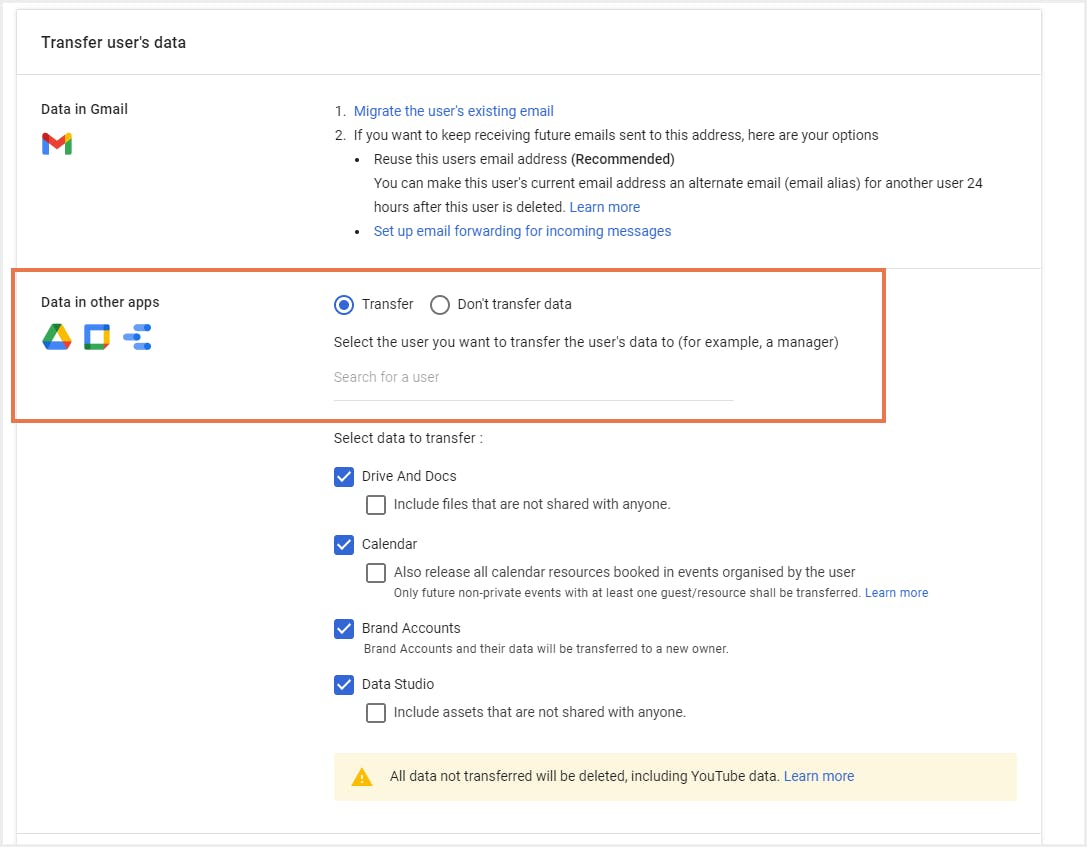
Step 5: In the next page, select the application data of the user that you want to transfer.
Note:
- Only a super admin can transfer data during user deletion.
- Any data that is not transferred to another user will be deleted after 20 days.
- You can transfer all types of content owned by the user, including documents, spreadsheets, and slides, but not Google Photos
Step 6: Enter the email ID of the person you want to transfer the data. Confirm "Delete user/users."
Note: The user will be suspended until the data transfer is complete.
4. The Ultimate Solution to Avoid Data Loss- Backup!
4.1. How can you Back up Google Workspace Data?
4.1.1. Google Takeout
Google Takeout is an effective tool for downloading data from all Google Workspace applications. To know more about how to backup Google Workspace using Google Takeout, click here.
Limitations of Google’s Native Features:
- Complicated recovery process
- Google Takeout does not allow you to download files by someone else.
- Google Takeout has a limit of 2 to 3 archives per day.
4.1.2. Take Google Workspace Backup using Third-Party Tools
Third-party applications like SysCloud help you to not worry about your data security anymore!
SysCloud is a fully automated cloud to cloud backup and restore service for Google Workspace and Microsoft 365. SysCloud uses top trusted web services like Amazon Web Services (AWS), Microsoft Azure, and Google Cloud Platform to store data.
SysCloud’s easy-to-use management portal lets you:
- Search and restore files,
- Export a copy of documents or accounts for local archiving, and
- Run reports to monitor the status of your backups.
| Feature | Google Native | SysCloud | |||
|---|---|---|---|---|---|
Backup Frequency | Manual/One-time | Automated Daily | |||
Cross-user Restore | ❌ Not available | ✅ Yes | |||
Permissions Retention | ❌ Not preserved | ✅ Preserved (configurable) | |||
Show more | |||||
To learn more about how SysCloud backs up Google Workspace, click here.
5. Best Practices for Google Security before you Delete a User
5.1. Change the user’s password
Step 1: Login to your Google Workspace using your admin credentials and go to Google Admin Console.
Step 2: Go to users from the Google Admin Console page.
Step 3: Hover over the user from the users' list and click on ‘Reset Password.’

Step 4: In the Reset Password box, select an option,
→Automatically generate a password or,
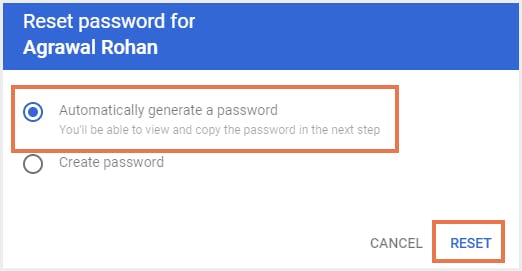
→Create password

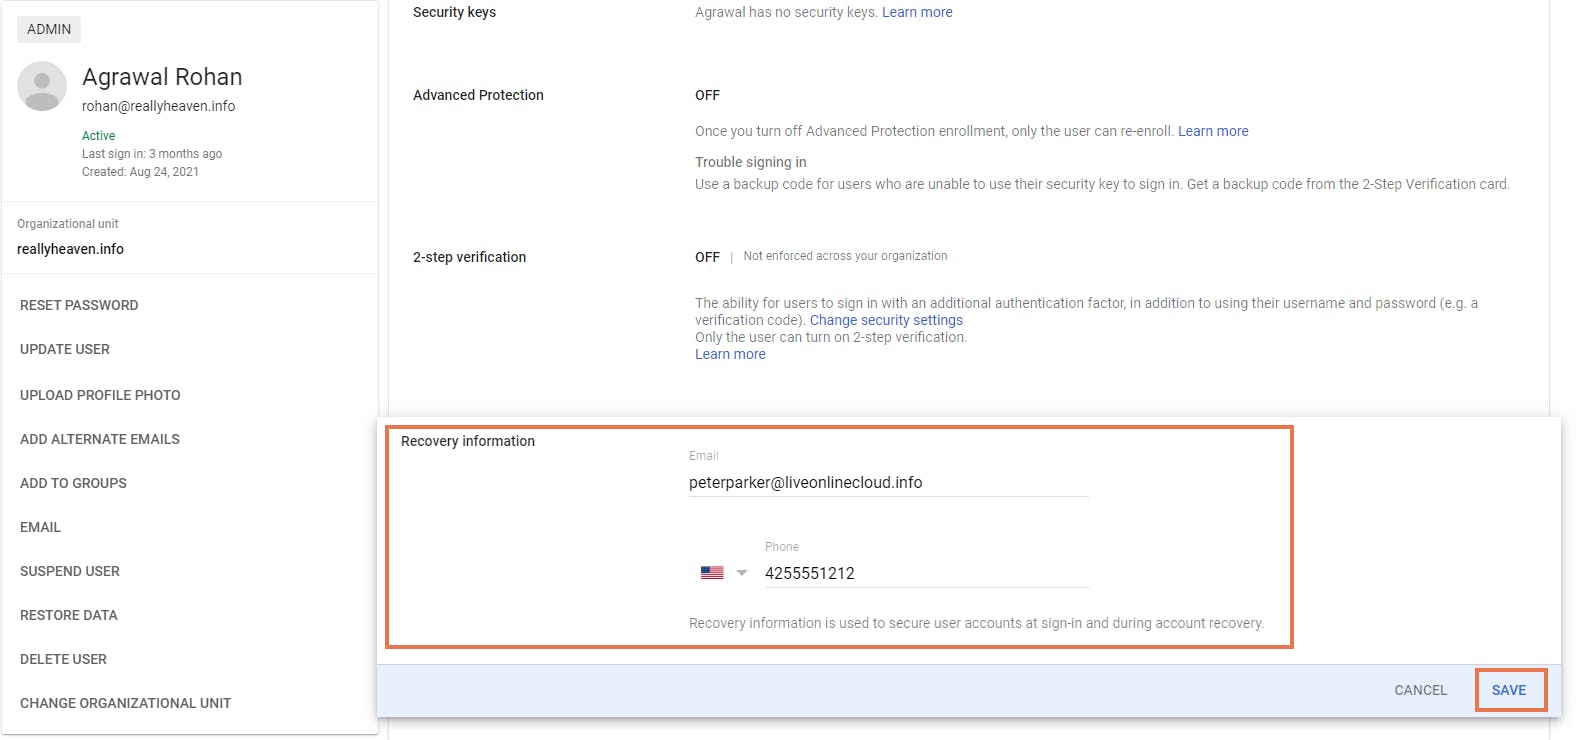
5.2. Revoke password recovery access
Step 1: Login to your Google Admin Console and go to Users.
Step 2: Click on the user’s name to open their account page.
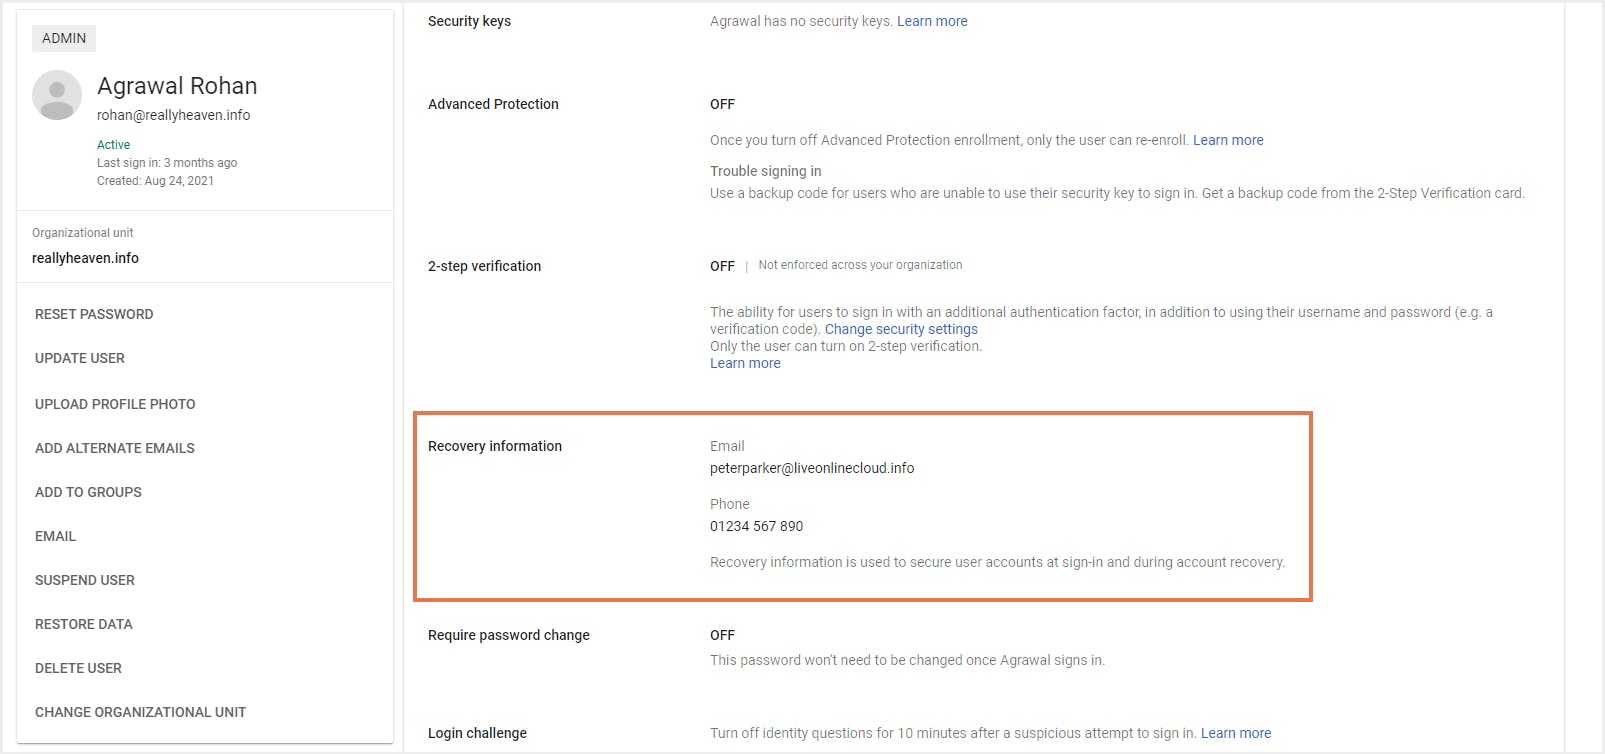
Step 3: From the recovery information option, delete the recovery email id and phone number.
Step 4: Click on Save to confirm the changes.
5.3. Remove multi-factor authentication:
→Disable the 2-factor authentication that requires the user’s phone to sign into the Google Apps account.
→Remove security keys that have been registered as the second step of authentication to access the Google Workspace account.
Step 1: From the user account page in the Google Admin Console, go to the Security tab.
Step 2: Disable 2- step verification and remove all security keys.
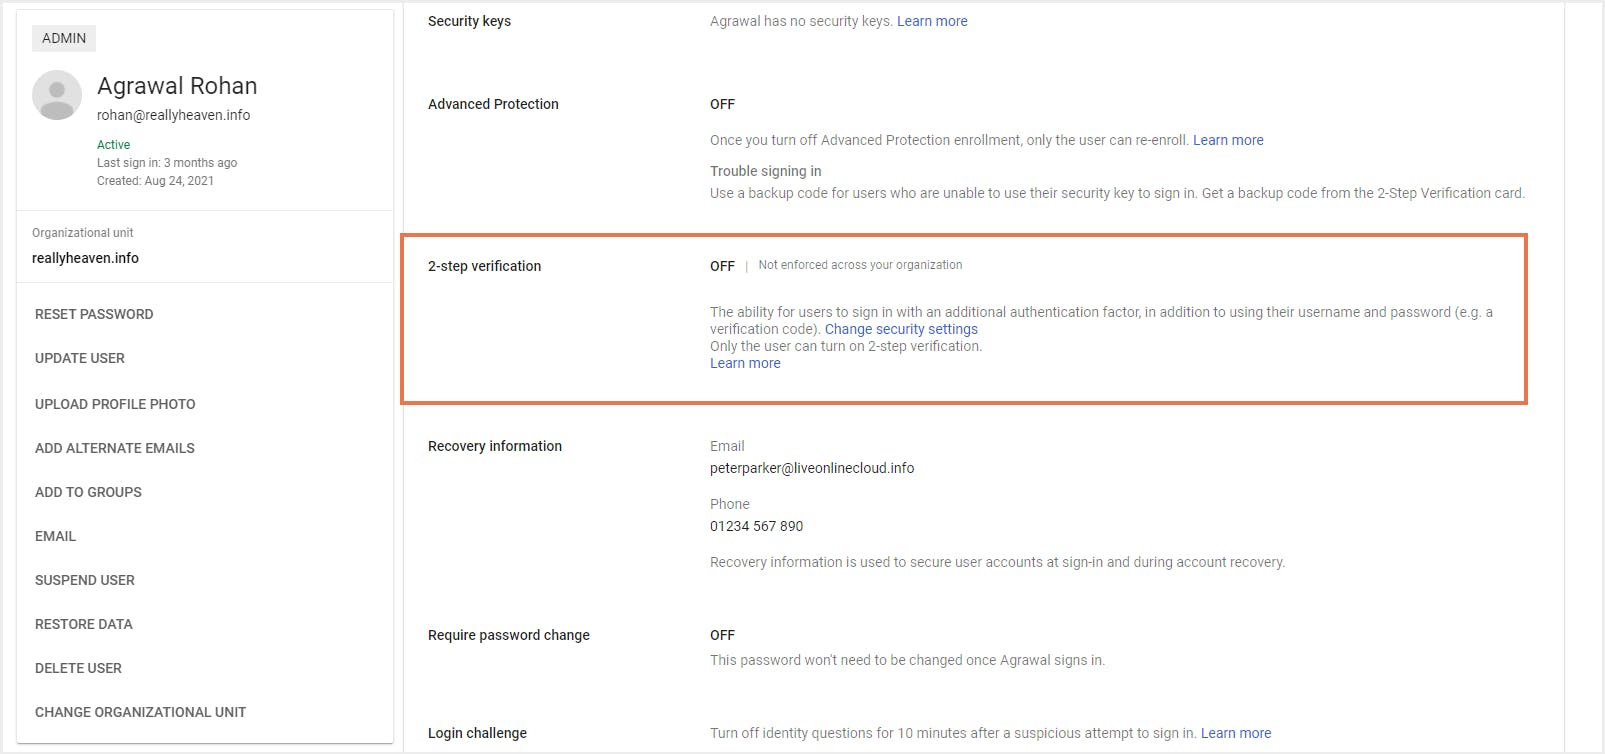
Step 3: Click on Save.
5.4. Wipe copy of data on mobile devices
If the user was signed into multiple devices from the Google Apps account, it is advisable to perform a remote wipe of the complete account data.
5.5. Remove OAuth 2.0 application tokens
The user would have logged in to different applications using the single sign-on facility of Google Workspace. Although changing the password would automatically reset the tokens, it is a good practice to review the applications that have access via the Google Apps account and revoke them completely. You can sign into the user’s account and check the permissions here.
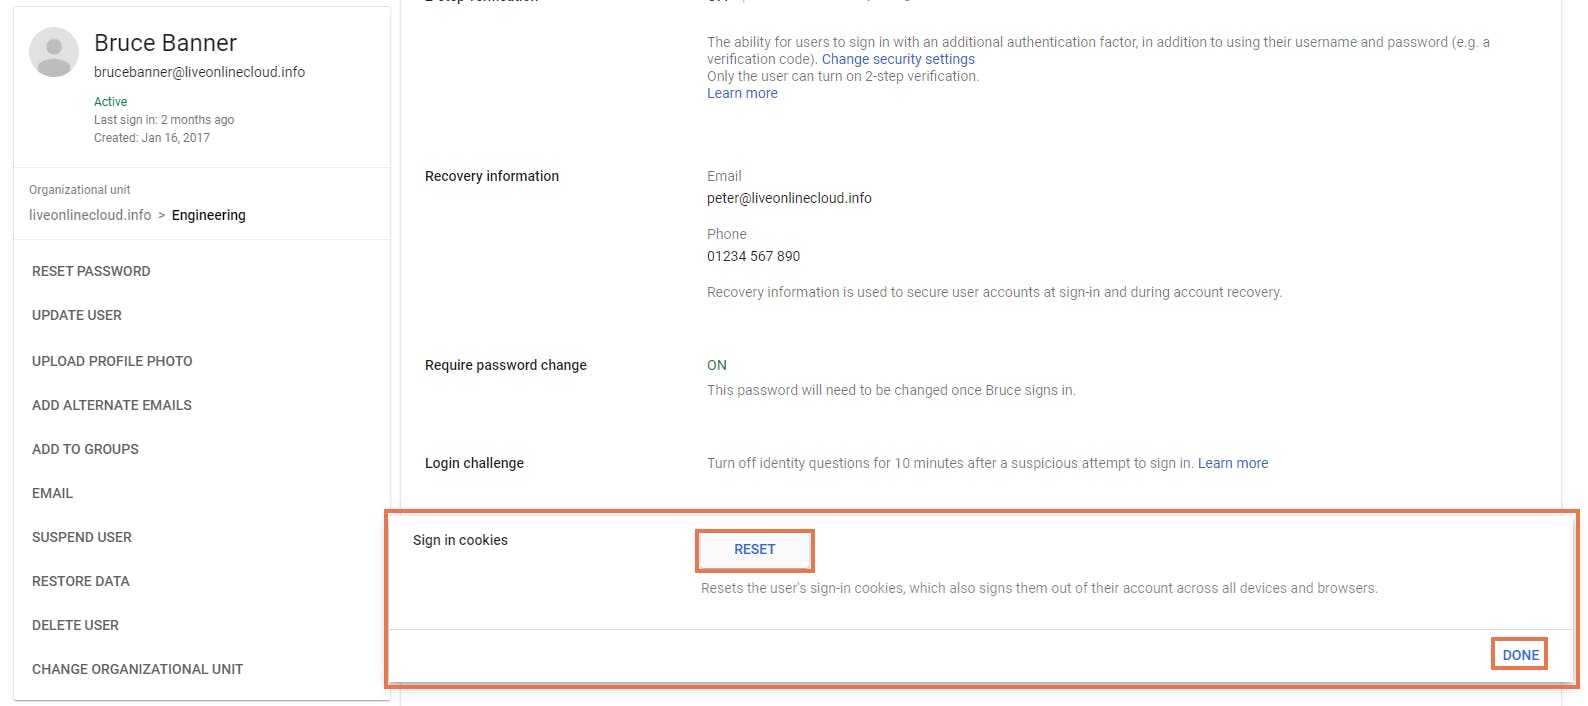
5.6. Reset login cookies
Step 1: Select the user from the user’s list in Google Admin Console.
Step 2: Go to the security tab on the user account page and click on sign-in cookies.
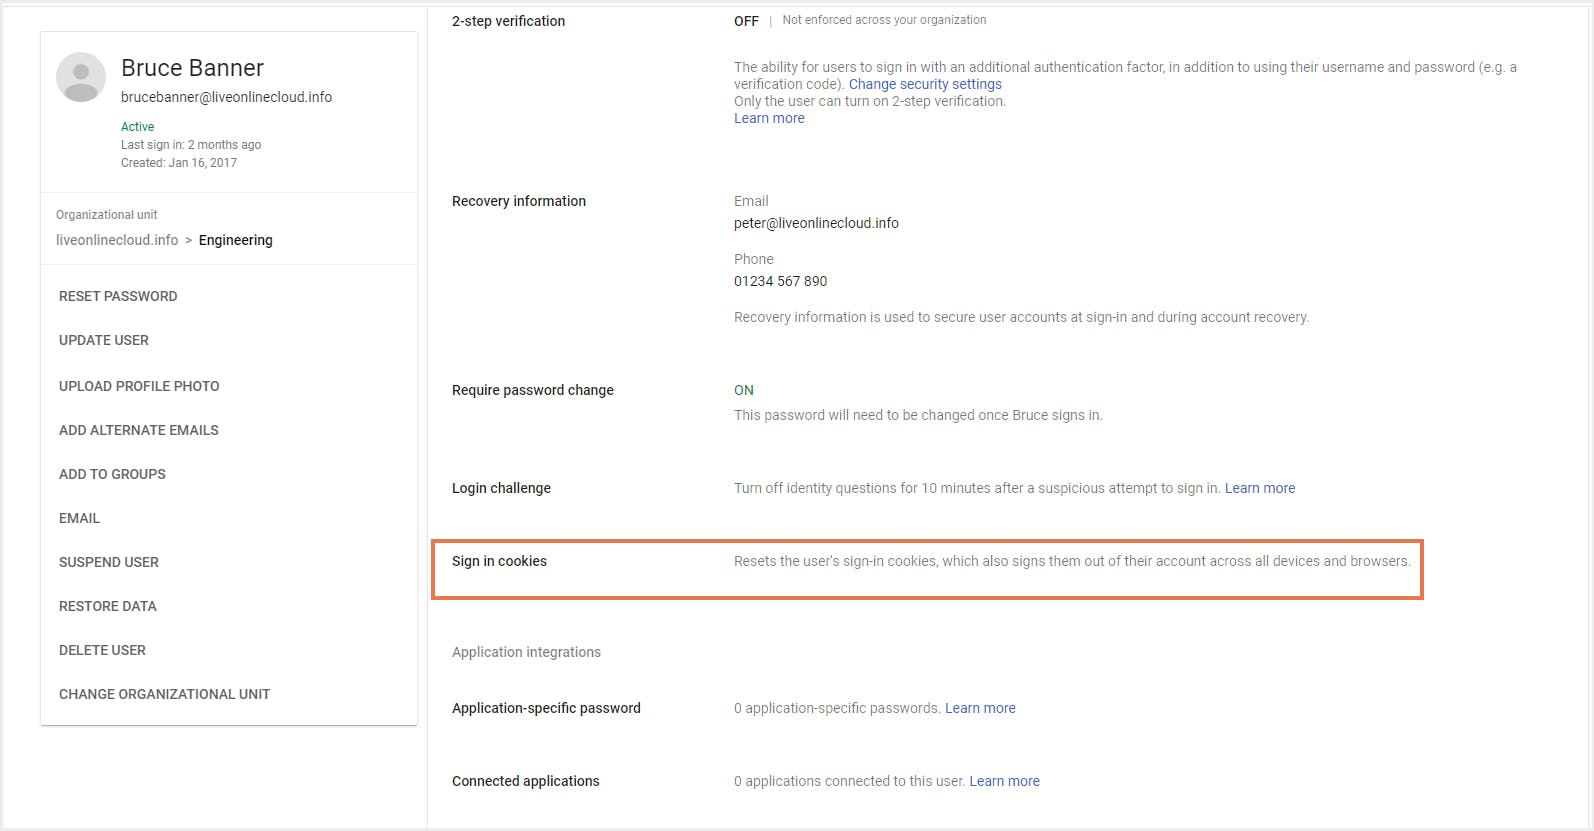
Step 3: Click on Reset Cookies which signs them out of their accounts from all devices and browsers.
Secure Your Data with SysCloud
You've learned how to delete a user from Google Workspace without data loss. Now, take the next step. Discover how SysCloud automates backup, ensures compliance, and provides effortless recovery for Google Workspace.
Recommended Content
28 Dec 2021
10 min read
12 Mar 2025
5 min read
10 Sept 2024
10 min read
8 Apr 2025
10 min read
Get actionable SaaS administration insights
We don’t spam. Unsubscribe anytime.
In this article
- Introduction
- Steps to Take before Deleting a User from Google Workspace
- How to Delete a User from Google Workspace?
- The Ultimate Solution to Avoid Data Loss- Backup!
- Best Practices for Google Security before you Delete a User

